Complete Guide to Vectorization Options
Welcome to the official documentation for Vectorise.Me. This guide provides a comprehensive overview of every setting and feature available in our tool. Use it to unlock the full potential of your image-to-vector conversions and achieve professional-quality results.
The Converter Interface
After uploading an image, you are presented with the main converter interface. It is divided into three key areas: the Quick Start Presets at the top, the detailed Options Panel on the left, and the interactive Preview Panel on the right.
Quick Start Presets
This is the fastest way to get great results. The presets are expertly-tuned collections of settings optimized for common image types. Simply click a card that matches your image (e.g., 'Clipart / Logo'), then select a detail level ('Low', 'Medium', 'High', 'Max'). This instantly configures all advanced options for you. You can then fine-tune them further if needed.
Main Controls
These are the most impactful settings for your conversion, located at the top of the Options Panel for easy access.
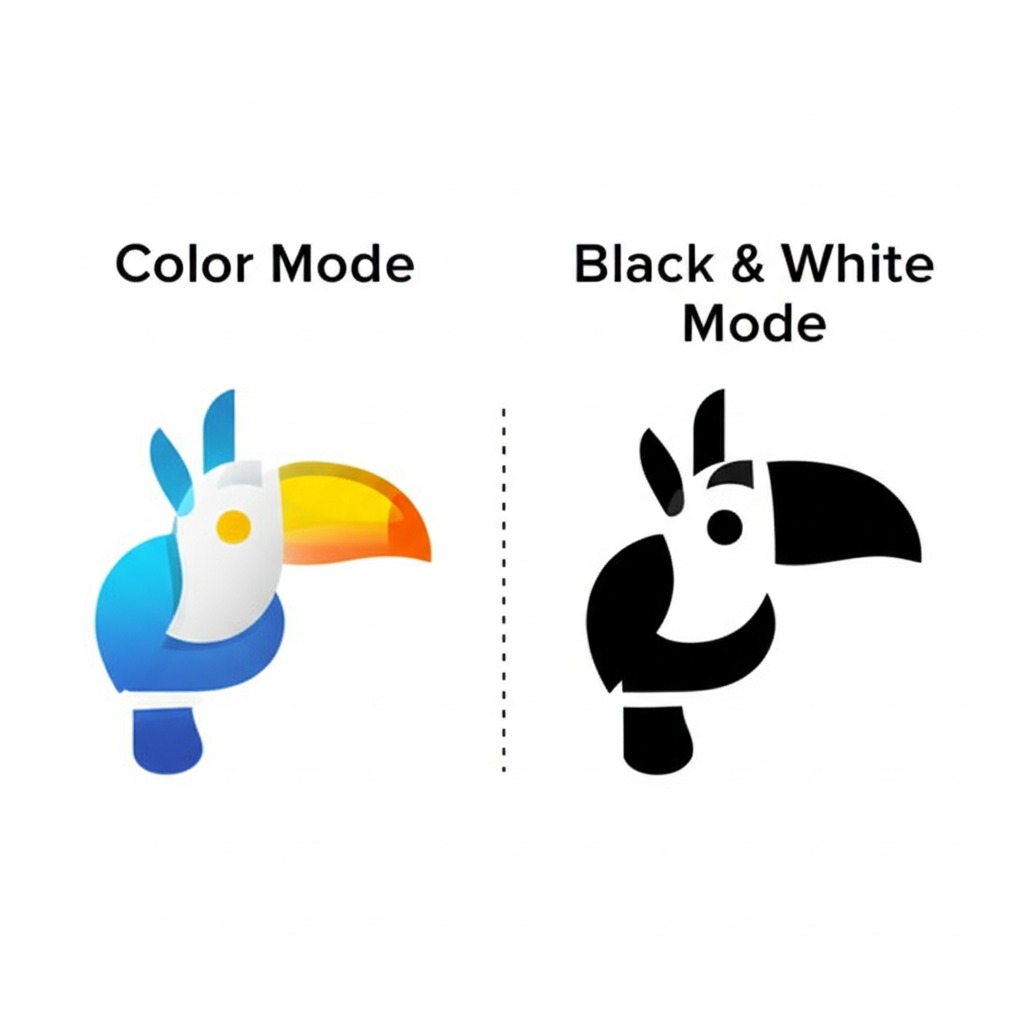
Color Mode
This fundamental choice determines the color space of your final vector.
- Color: Creates a full-color SVG that matches the source image's colors.
- Black & White: Converts the image to a two-tone (binary) output, ideal for simple silhouettes or stencils.
Color Detail
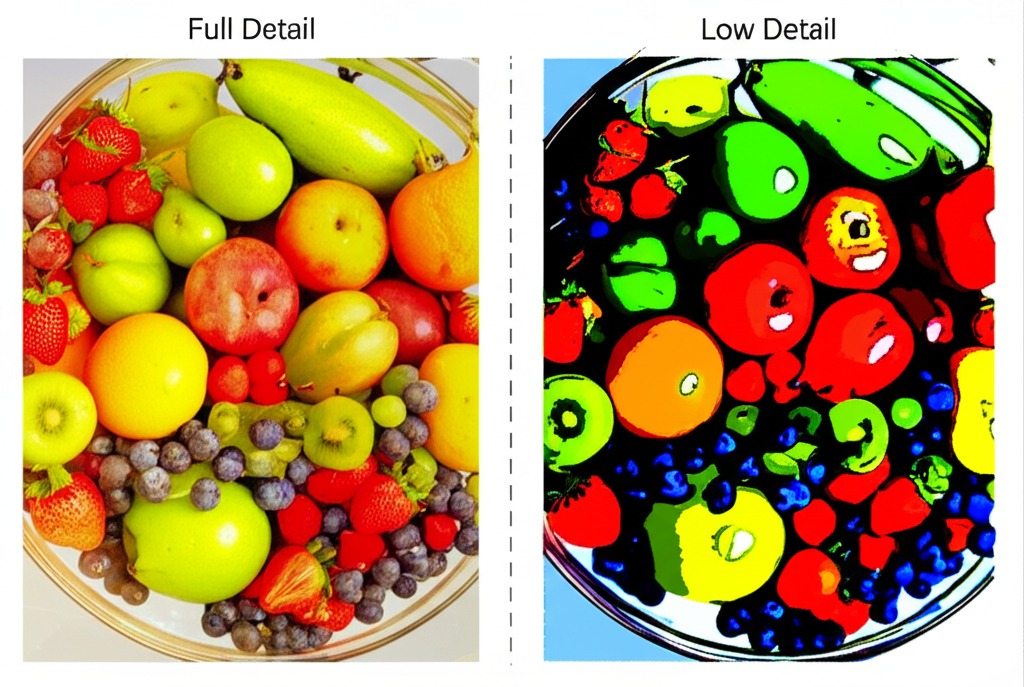
This powerful setting controls the number of unique colors in the final SVG (from 2 to 128). Reducing the color count is the most effective way to simplify an image and reduce file size. Our system intelligently analyzes your image to create an optimal color palette for the number you choose.
Mode
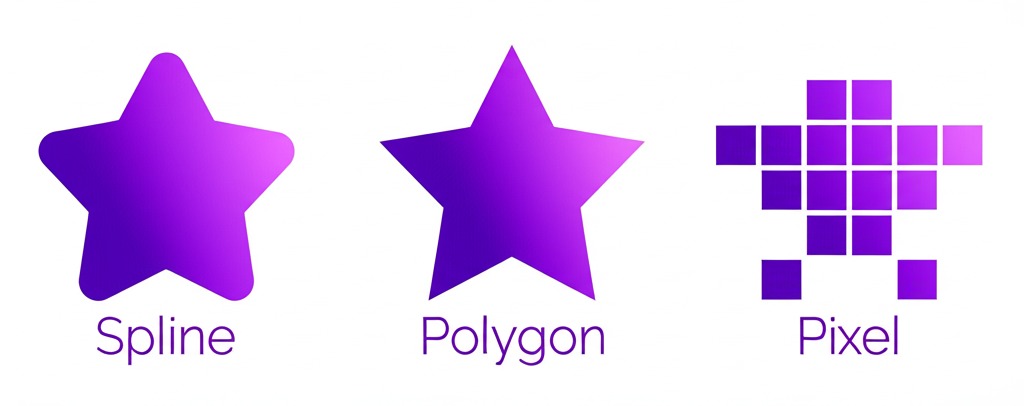
Determines the fundamental shape-fitting algorithm used to create the vector paths.
- Spline: Creates smooth, curved paths. This is the best choice for most images, including illustrations and photographs, as it produces natural-looking, organic shapes.
- Polygon: Creates paths with sharp, straight-line corners. Excellent for geometric designs or when a stylized, low-poly look is desired.
- Pixel: A special mode for pixel art. It converts each pixel into a perfectly aligned square vector shape, creating an infinitely scalable and clean version of the original.
Filter Speckle
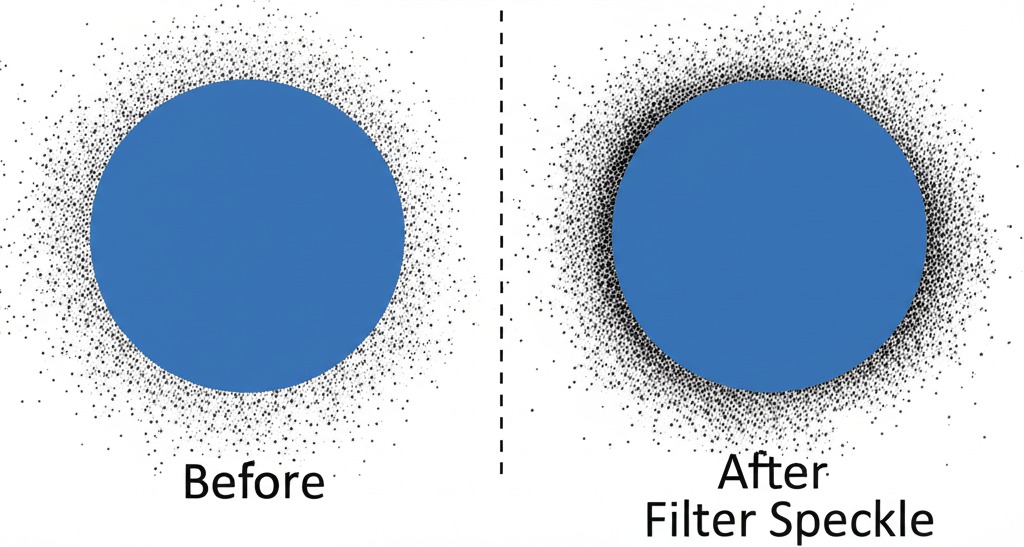
This is a cleanup tool that removes small, unwanted spots or "speckles" of color from the image. The value represents the size in pixels of the speckles to remove. This is extremely useful for cleaning up noisy source images and can significantly reduce file size by ignoring irrelevant details.
Advanced Options
For maximum control, expand the 'Advanced Options' section. These settings allow you to fine-tune the tracing engine's behavior.
Geometry & Path Fitting
Path Precision
Controls how closely the vector paths follow the original image's contours. Higher values result in more detail and accuracy but can lead to larger file sizes. Lower values produce simpler, more generalized paths.
Corner Threshold
Determines how "sharp" a corner must be (in degrees) before the tracer creates a hard-angled point instead of a smooth curve. A high value (e.g., 100°) is great for logos and technical drawings. A lower value will create smoother, more rounded corners.
Segment Length
(Spline mode only) Controls the length of curved segments. A higher value ignores shorter features and creates longer, smoother curves. A lower value will capture more intricate, short curves.
Color & Layering
Layering
This setting dictates how different colored shapes are arranged.
- Stacked: Creates complete shapes for each color and layers them on top of each other, from back to front. This is the most common and compatible method, excellent for preserving transparency.
- Cutout: Creates shapes with "holes" in them. This can sometimes result in smaller files but may be less compatible with some editing software.
Gradient Step
Controls the smoothness of color transitions. A higher value allows the system to create intermediate color steps to simulate a smoother gradient, which is most effective when using a high Color Detail setting.
Post-Processing
Simplification
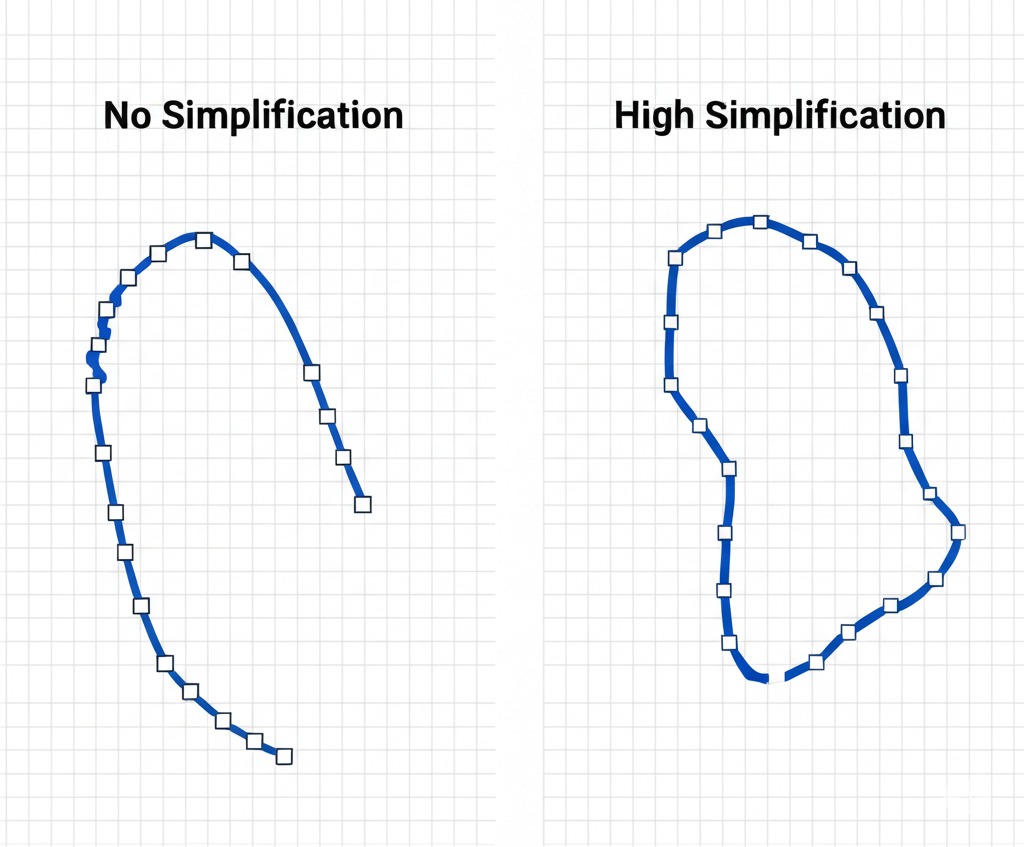
Geometrically simplifies the final vector paths by removing redundant anchor points. A higher value results in greater simplification and smaller file sizes, but may slightly reduce detail. A value of 0 disables this step.
The Preview Panel
The preview panel on the right is your interactive canvas for inspecting the conversion. It features a permanent side-by-side view, allowing you to instantly compare your original image with the generated vector result.
Zoom & Pan
The SVG Editor
For ultimate control, Vectorise.Me includes a powerful built-in SVG editor. After generating an SVG, click the Edit SVG button to open it. The editor allows you to make precise adjustments without needing external software.
Selecting & Modifying Shapes
Click on any individual shape in the editor to select it. Once selected, you can change its fill color using the color picker in the toolbar, or delete it entirely with the delete button.
Global Palette Editing
The left-hand panel shows a global palette of all colors used in your SVG. Clicking a color swatch in this panel will highlight every shape using that color. You can then use the color picker to change that color everywhere it appears in the image simultaneously. Use the "Group Colors" slider to merge visually similar shades into a single swatch for easier editing.
Node Editing (Advanced)
For fine-grained control, select a shape and click the "Edit Nodes" button. This will reveal the individual anchor points (nodes) that make up the shape's path. You can click and drag these nodes to adjust the curves and outlines of the shape with precision.
Saving & Loading Settings
Vectorise.Me allows you to save your entire configuration to a file. This lets you quickly re-apply the exact same settings to future images, ensuring consistency and saving time.
How to Save Settings
After adjusting the options, click the Save button in the header of the Options panel. Your browser will download a small text file named `vectorise-me-settings.json` containing all your current settings.
How to Load Settings
To use a saved configuration, click the Load button. Select the `.json` settings file you previously saved, and the options panel will instantly update. You must still click 'Update Vectorization' to apply these settings to your current image.
Downloading Your Vector
Once you are satisfied with the preview, you can download your file in several industry-standard formats.
Download Formats
- SVG (Scalable Vector Graphics): The modern standard for the web. Perfect for web design, logos, and use in modern vector editing software.
- PDF (Portable Document Format): A universal format excellent for printing and sharing. Vector PDFs can be opened and edited in most professional design applications.
- EPS (Encapsulated PostScript): A legacy vector format still widely used in professional printing and publishing workflows.
Glossary of Terms
Raster Image
An image made up of a grid of pixels (e.g., JPG, PNG). Raster images lose quality and become blurry when scaled up.
Vector Graphic
An image made of mathematical paths, lines, and curves. It can be scaled to any size with zero loss in quality (e.g., SVG, PDF).
Path
The fundamental building block of a vector graphic, defined by a series of points (nodes) and the curves between them.
